A Guide to Preparing, Proofing & Using Specialty Inks
First published in FLEXO Magazine, June 2014 issue.
Written by Harper GraphicSolution Director, Alexander James
Printers continue to strive for ways to get both the print buyer’s and the consumer’s attention. As a printer, have you been looking for something that makes your printed product stand out among the rest? Are you vying for an edge in obtaining market share in the label business? You should consider the expanding field of flexographic specialty applications. Specialty applications that provide the “pop” in your print cover a wide range of visual stimulations that differentiate a product from the rest.
Some of these include:
• Glitter
• Metallic
• Fluorescent
• Pearlescent
• Holographic
The hard part is getting these inks from plate to substrate. A lot of that has to do with testing, proofing, proper anilox selection and an understanding of the inks themselves.
PICKING “POP”
Before starting on any print project, it is imperative to define the goal. What is the effect you are trying to create? Are you trying to match a print sample or simply wanting to create a dynamic effect? Let’s look at a couple of applications as examples.
 Specialty inks are special for a reason. They are unique not only in effects but also in setup, handling and testing. Make sure you understand the requirements to print and plan to run testing before committing product to a customer. We often find that rushing to completion on a specialty ink project has about the same low success rate as a poorly planned fingerprint.
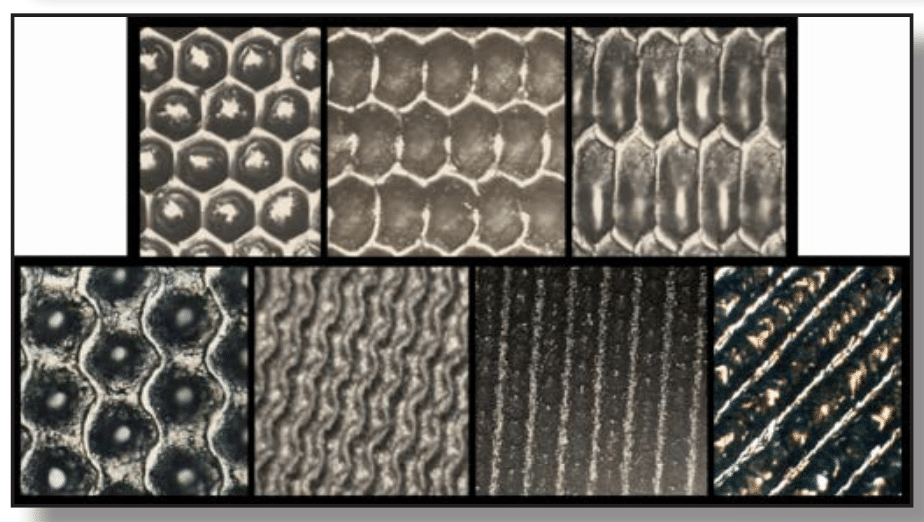
You might start with a popular recent admission to flexography: The realm of tactile coatings. Tactile effects create an interesting interaction between the consumer and the product. Raised bubble areas or dew drops and raised grid patterns on your graphics can create that surprise “wow” factor that helps differentiate your product from the competition by capturing the consumer’s attention as he/she explores the feel of the packaging or label.
You might also consider a specialty effect like a color shift of the graphic image using thermochromatic inks, whose color shift is triggered by temperature change from physical touch or a change in the temperature of the substrate or content of the package. While these are exciting developments for flexo, consider a word to the wise: Before you proceed, be sure to match the ink’s ability with your end print expectations. Accomplish this by obtaining printed examples from your ink supplier that demonstrate printing methods that are at least adaptable to your existing capability.
PREPARING “POP”
So what do we need to do first? Set up a meeting with your ink supplier, anilox supplier and production staff to discuss goals and review how to pre qualify the variables prior to going to production. Request the technical data sheet and MSDS sheets for your specialty ink. These are very informative documents that you and your anilox supplier will need to make decisions. You can expect to find information regarding particle sizes, which can be particularly helpful when dealing with glitter, pearlescent and metallic inks. Often the particle size determines volume requirements because the particles have to be able to fit and sometimes flow within the cells.
These sheets will also indicate an ink’s shelf life, which is often much shorter than standard ink systems. You may be surprised to find a batch life with an expiration date only a month from receiving. Many of these inks have longer lead times because they are not kept on the shelf, but are made to order when needed, due in large part to the short shelf life. Plan your tests accordingly. Don’t order the ink and then push off the testing for months. Make the commitment to test.
Specialty inks may also be somewhat less stable thermally, so the inks must be kept within their temperature window. This means no freezing, no high humidity and storage in a stable window of operating temperature. Make sure you know what you can or cannot add to these inks for reduction and what to use for cleanup. Shocking a batch of ink can be very frustrating in the middle of a trial or during an anilox cleanup. You will also need to verify the type of substrate you are using to make sure the ink you want to use is compatible with the substrate.
Learn what drying requirements are needed. If you are working with an older press running a water based application where you have only successfully dried ink films from 10 bcm volume aniloxes, and you are now going to put in a 30 bcm roll for glitter, you will find out that your drying capacity becomes a great hindrance to run speed and may not dry enough between stations. You are going to want to fully represent your printing process in the trial run. Testing should include the substrate you plan on running in production, the same inks and, where possible, the same setup. This will also give you some indication of potential drying or curing issues you may need to consider when going to production.
ANILOX SELECTION
Once you have decided what your goal is and have the technical information on your ink or coating, it is time to select your anilox. Keep in mind the particle size of your ink grind when dealing with glitter, pearlescent and metallic inks. A good rule of thumb when selecting an anilox is to maintain a minimum anilox opening to particle size ratio of 2:1. This method helps to select an anilox specification with a large opening and shallow depth. With this minimum ratio you will have a greater chance of enabling your ink particles to flow into and out of your anilox, transfer to your photopolymer and result in your desired specialty effect. Guidance from your anilox supplier will help determine which type of engraving will be the best fit.
Thankfully, today there is a wide range of different anilox engravings to choose from:
• 30 degree channel
• 45 degree trihelical channel
• 60 degree hexagonal
• Elongated hex
• 70 degree hexagonal
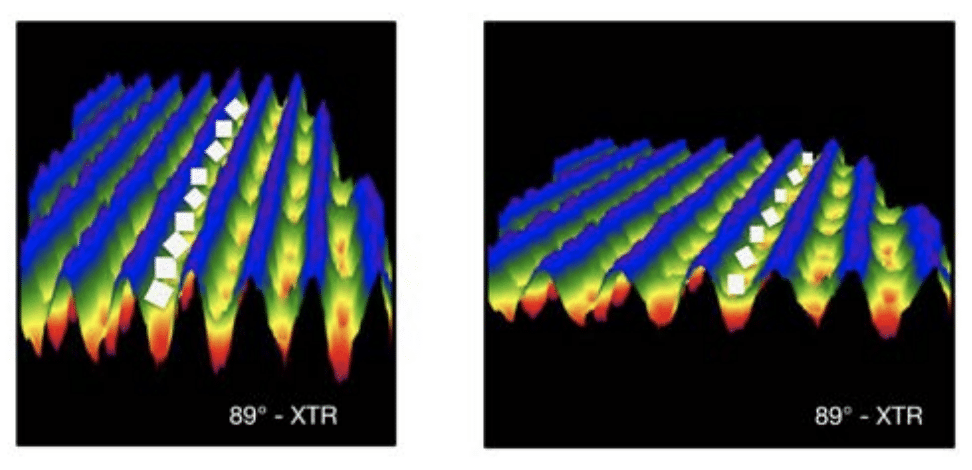
• 90 degree XTR channel
Regardless of the type of engraving chosen, keep in mind that with this kind of application, you will need to lay down a lot of ink to achieve the desired effect. For example, working with your anilox supplier, if the pigment grind of your ink is 35-40 microns, you will need to select engravings with minimum cell openings of 70-µm. to 80-µm. and 280 cells per inch (cpi) or lower. At 280 cpi, the cell opening is 85- µm. and engravings with lower specifications will have even larger cell openings. There are exceptions to every rule, so you must also inquire about the particle shape.
Some particles require depth, as well as opening because the shape may be more round where most particles are a rod or flat flake and fit in the cells. Round particles need room to fit inside the cell.
Using the engraving specification of 280 cpi with an opening of 80-µm., we can then review how much volume will be required. Consulting your ink supplier, if it happens that you’ll need 7.0 bcm for the specialty ink with flat or rod type particles to work, then review where 280 cpi, 7.0 bcm falls into the chart. You will see 7.0 bcm falls close to the end of the standard (green) engraving range.
Keep in mind the particle “ size of your ink grind when dealing with glitter, pearlescent and metallic inks—A good rule of thumb when selecting an anilox is to maintain a minimum anilox opening to particle size ratio of 2:1.
As the anilox supplier, I would suggest moving to a lower engraving specification, such as a 220 cpi with 7.0 bcm. The reason for making this adjustment is so the engraving is now to the middle of the volume range and the cell opening is a little more than two and one half times the pigment grind. This choice should result in easy ink laydown and less issues with plugging. Note that you can have same volume with different cell counts and cell openings, so consult your ink supplier and anilox supplier. Making the right choice will dramatically impact your chances of success. Make sure you know the condition of the anilox you are going to use. You can easily have the anilox specifications but not get the results due to wear or cell plugging
PROOFING “POP”
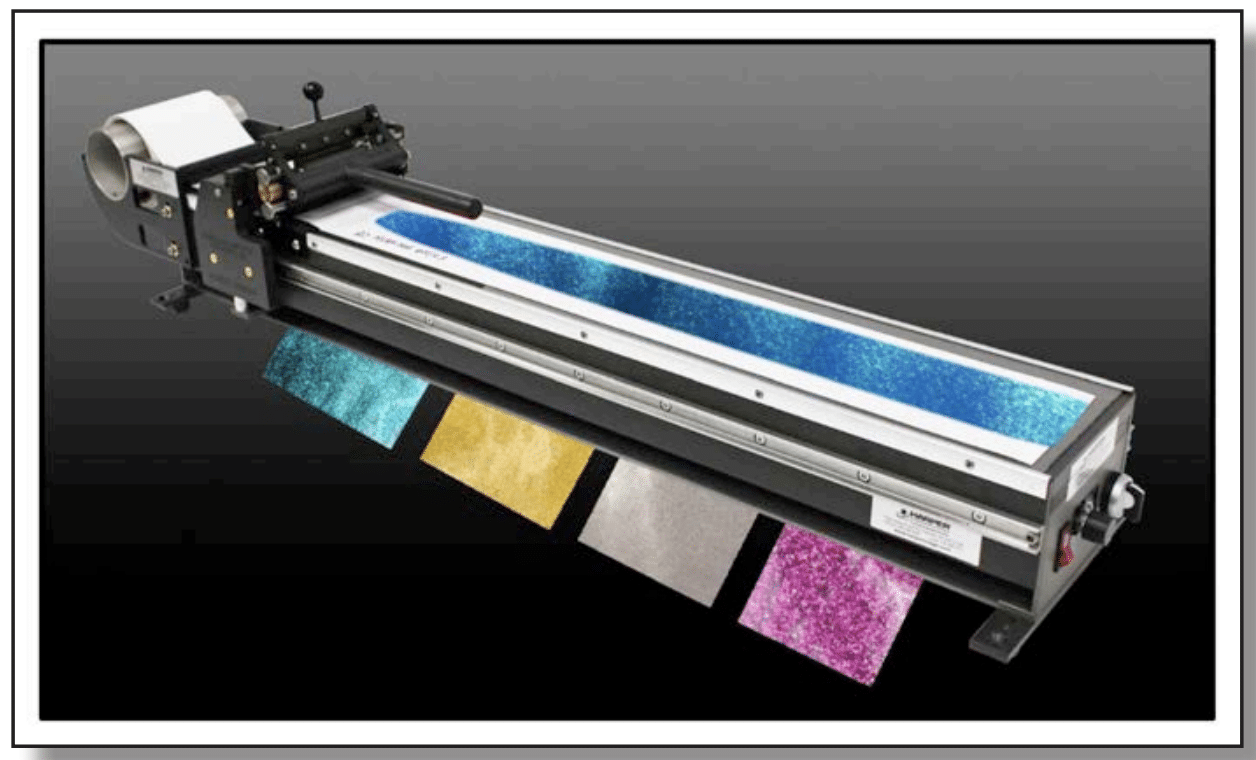
It was mentioned earlier that it is always a good idea to conduct as much testing as possible prior to going to press when embarking on new projects. If you are not 100 percent confident in the ink and anilox combination, then consider another step in preparation. This step involves proofing. Proofing is a more cost effective way to determine whether the desired effect is achievable. There is a variety of tabletop testing equipment available that will enable you to conduct proof print trials. You want your proofing device to mimic your press, so proofing that incorporates your ink, anilox and substrate is preferred for repeatability in press. In the case of UV based inks, you can also test curing requirements with small tabletop curing units. Testing will provide a snapshot of potential challenges you may face before going to production if you are considering different run options.
 For example, on a tabletop proofing device it is rather easy to conduct a double hit of your ink using different anilox volumes and drying or curing settings. At this stage you can also conduct very cost effective experimentation with a variety of different substrates. In contrast, webbing and running an entire roll of material on press is wasteful, when a few passes on a proofer can achieve the same results. Proofers need to be simple to use. Some tabletop devices have quick anilox switch out options that make it rather easy to change out and test different anilox engravings and specifications. This can be important, especially with considering the need for a double bump of the same material or multiple passes like a primer or opaque white. These various passes will likely use different types of anilox specifications in order to achieve your desired goal. Having it all there for proofing makes good economic sense.

 Once you have a good handle on what you want the effect to be, you can then be comfortable making any final tests of design at the press. The “pop” of any specialty ink can be enhanced further by how you include the effect in the design of the product.
If you plan to utilize graphic options and not just print a solid, you may have to balance these requirements with the desired effects. You can use a banded roll that brackets the original volume and line requirements to enhance the printability. Pair a graphic design or designs you want to test with the banded roll and run them at the desired production speeds to test process requirements.
FINAL CHECKS
Other things to keep in mind as you transition from testing to a production setup are ways to maintain the inks, drying and curing options. Make sure you start with an ink that has just been thoroughly blended to get all particles in suspension. All glitter and pearlescent inks must be kept in suspension to create the desired effect and it is reasonable to think some settling will occur, so blend. You may also have to look at ways to keep the inks moving in the pan. Make sure the base system the particles are in is one that actually suspends them. Often we find using a pumping system instead of letting inks sit statically in the tray is better for print consistency.
 Depending on your production equipment you may need to do some adjustments with your doctor blade. For example, in single blade setup when applying a thick layer of tactile ink, your goal is to allow the doctor blade to float or butter the coating—not shear it. This will increase the layer of ink that makes it to the polymer and then to the surface. You may need to adjust the web path as well to allow sufficient time for drying or curing. Confirm you have sufficient drying capacity or curing capacity (a minimum 400-w.) or that your curing lamps are well maintained and in good working order. It would be worth having your drying system or UV cure lamps inspected, cleaned and revamped, if necessary.
Think about cleanup, too: What type of chemicals will you need to clean up at the conclusion of your printruns? This will depend on the type of ink or coating used. Each will require a different cleaner and any that are fast drying will require special attention at cleanup time. Keep in mind that regardless which type of ink you use, it is always easier to clean when the ink is still wet. While the ink is being saved for future use, focus on cleaning the anilox before any other component.

 About the Author: Alexander James has a Masters of Science in graphic communications from Clemson University and a Bachelors of Fine Arts degree from the University of North Carolina at Asheville, NC. With more than 20 years experience in the graphic arts industry, Alex has participated in many industry related events as guest speaker/presenter. He is the director of Harper GraphicSolutions—the technical Division of Harper Corporation of America—and is also FIRST Level III Implementation Specialist Certified. He has authored numerous technical flexographic related articles.
To view the original FLEXO Magazince article click HERE.


