Pressroom Awareness Makes Both Possible
First published in FLEXO Magazine, June 2013 issue.
Written by Harper Technical Solutions Manager, Bill Poulson
An anilox roller is a precision tool that is used in the flexographic printing process. Handling techniques will have a lot to do with how it performs, as well as how it will last through its lifecycle. Many variables within the flexo process can cause premature wear or damage to the anilox roller. All are areas that affect the efficiency and finally the profitability of the manufacturing process and anilox roller budget. Many of these issues also have a direct effect on run time efficiencies of the pressroom.
When production is stopped for unexpected anilox roller changes or unnecessary downtime, the plant is losing money. Two areas worth focusing on in attempting to alleviate the problems are anilox management and the doctoring of ink through the flexo process.
It’s a given that every flexo printing plant should have an anilox management program. Essential elements follow:
a. Have an active inventory list put together for each press line or press type. This will allow you to track each roller as it comes into your plant. Once the roller is unpacked it should be identified and listed into inventory. Place a new number on each roller for easy identification and make sure that number correlates with the manufacturing number supplied as well. Document date-in, as well line screen, volume and any other data that is necessary
b. Create a tagging or identification program. Tags should mirror the anilox list
c. Once the tag is assigned to a specific anilox roller, it will stay with that roller. This has to be known to all that handle these rollers. The tag will be listed at the press station when the roller is placed into the press as well. If this practice is maintained, the system will take care of itself and all anilox rollers will be identified at a glance, wherever they are in the building.
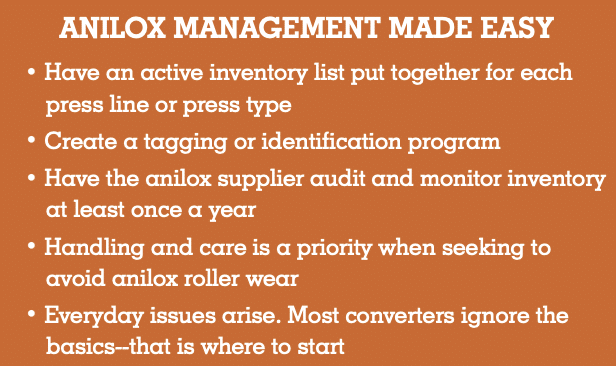 d. Have your anilox supplier audit and monitor your inventory at least once a year. Handling and care are given when you are discussing anilox roller wear and the everyday issues that arise. Most converters have issues with the basics, and that is where you have to start. All the work is done upfront by the anilox coordinator, so the operators only have to make sure that when the time comes for putting a system together, they only have to manage the tags and make sure they stay with the rollers. This simple method will need a person to manage it. It is not a full-time job but needs to be done by an individual that is methodical in his or her duties.
INK FLOW & DOCTOR
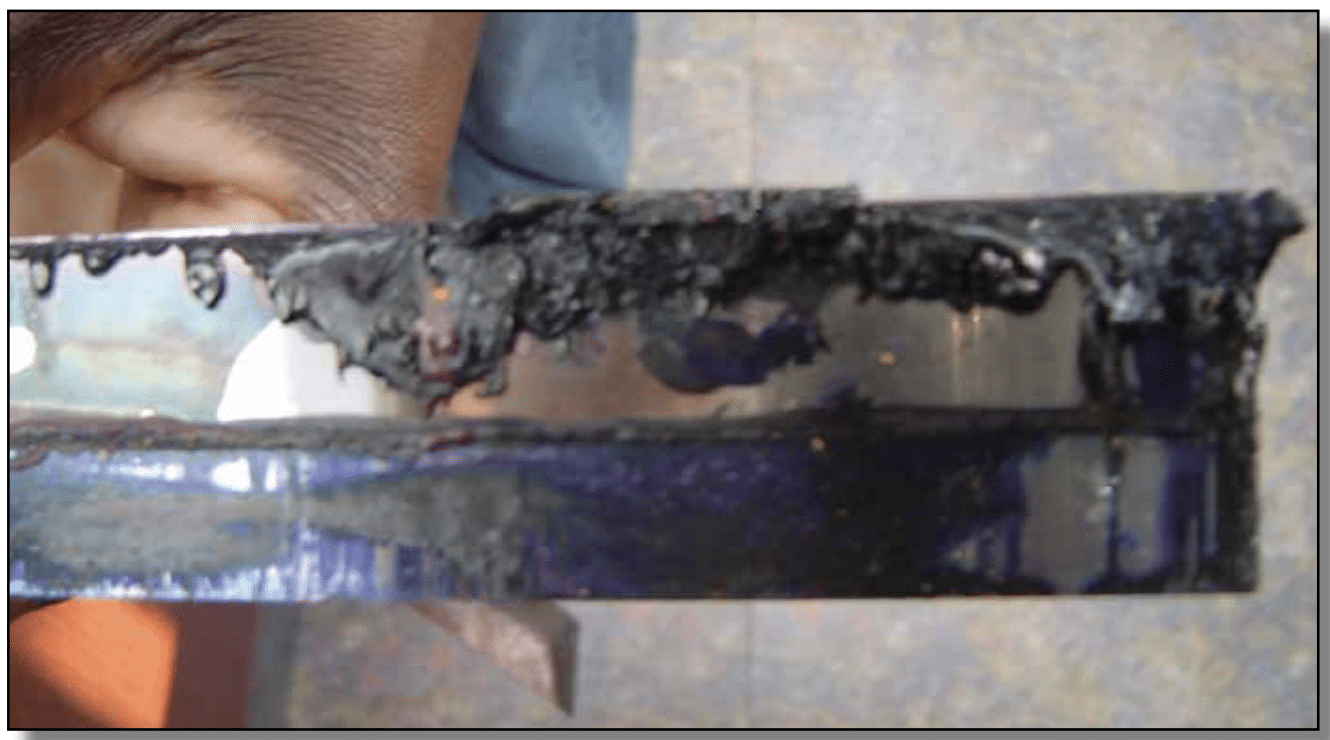
Filters and magnets help assure that the ink stays clean and flows well. Ink goes to a solid state if pH drops. Solvent inks start to solidify and get more abrasive and affect friction of blade to the anilox surface. Photos: Harper GraphicSolutions.
Everyday issues can affect anilox wear. Look at every area within the flexo process that comes into contact with the anilox roller. Start with the ink system. Getting the ink to press and keeping the system clear of contaminates is a key issue. Newer presses use double pump systems to keep pressure down within doctor blade chambers. Keeping these pumps synchronized, so that they always pump at the correct intervals, affects ink flow to the anilox surface. This makes sure we keep a reasonable level of negative pressure in the ink chamber. This is most important when running at high speeds above 1,000 fpm. Make sure that the pumps are synchronized and this will directly affect ink flow within the chamber.
Ink should always have a slow and steady stirrer. Do not depend on the agitation of the pump or the impellers to do the stirring. Stirring the ink should be independent of pumping. Excessive pump pressure or over stirring the ink will introduce air into the ink.
If pumping ink to the pressroom from another room within the building, make sure that the ink lines stay clean and free of corrosion. Stainless steel lines are recommended, so that corrosion does not become an issue over time.
INK VISCOSITY
Ink viscosity goes up and the ink starts to solidify. That causes more friction at the surface of the anilox roller. Maintain the proper viscosity. Know what the viscosity is for every color in the press and document it. The pressroom environment can cause the ink to evaporate solvents at an accelerated rate. When this happens, you will notice the viscosity goes up quickly and has to be maintained more often. This is where you need to take notice and check ink at intervals that will keep the viscosity from affecting the ink’s color and flow rate. Always add ink to the press at the running viscosity.
MANUAL CHAMB
Manual chambers for older press types will have manual inking systems. Make sure that the ink viscosity is maintained and the ink has a good flow. The ink return line should be twice the diameter than the in-feed line. If the chamber empties ink too fast, you will get starvation; not fast enough, you will create positive pressure within the chamber. If you have a dated system and cannot control the ink rate as well as needed, it can be adjusted with a hose clamp. Using more pump speed, as long as you do not whip or agitate the ink, can help as well. Do not put too much positive pressure into the ink chamber, or you will get end seal leakage and poor doctoring
INK FILTRATION MAGNETS
Ink filtration is mandatory. Have proper magnets needed for the ink type being used. Ink gets contaminated over time, so filters and magnets will help assure that the ink stays clean and flows well. Maintaining the proper pH and viscosity for the inks will also keep the ink flowing properly as well. Ink goes to a solid state if pH drops or when we get low in solvent blends the solvent inks start to solidify and get more abrasive. When this happens, the ink directly affects friction of blade to the anilox surface. Plugged anilox cells cause more friction at the surface of the anilox. Cleaner rolls wear less.
SCORE LINES
Many factors come into play that can create scoring. Score lines can come from ink contamination and ink abrasion, excessive blade pressure, blade alignment and many other indirect contact points to the anilox roller. Doctor blade pressures and doctor blade alignment is one of the most important factors to control day-to-day along with good end sealing of the chambers. When end seals leak the common response is to apply more blade pressure to seal the chamber and slow down the leak.

Corrosion can occur over time with a chamber, especially if using water-based or high pH inks. Make sure chamber materials are compatible with the ink chemistry. This corrosion will also get into the ink train and cause scoring and ink contamination.
Suggested Improvements: Follow OEM recommendations – Apply rare earth magnets – Use proper filters – Check for proper blade pressure settings – Chamber alignment – Look for warping and clamp distortion – Review blade type being used – Check for excessive back doctoring and correct the problem. Apply proper filters and magnets to ensure that all debris gets trapped and does not contaminate the ink environment. Clean filters out regularly or they will cause starvation within the ink lines, throwing all adjustments you made to the ink train out of balance.
BLADE MATERIALS

Chambers that are staged and ready to go will maximize makeready times and minimize anilox wear and tear. Chamber clamps should be cleaned often to ensure there is no interference for the blade to seat in the clamp comfortably and remain void of any ripple after the clamp is tightened.
There are many blade materials and types of finishes on doctor blades, from plastic to white carbon steel, that can be used for metering. The blade on the doctoring side of the chamber usually is steel. The containment side can be either steel or plastic. Getting the chamber to seal properly is a combination of pressure setting, as well as end sealing and containment blade techniques. Those who have had ink leakage issues and have made changes to their blade and end seal settings have been the most successful with the wear and surface condition of their anilox rollers. If the chamber is not sealing properly, it needs to be fixed. This can only happen by making modifications to the end seals or repairing the chamber in some way.
Contact your blade supplier when you have doctor blade questions. There is good support in this area of the industry for help troubleshooting pressroom issues.
CHAMBER INSPECTION
Chamber inspection should start with checking chamber alignment. Everything fatigues over time. Many of the materials that the anilox chamber is made of can fatigue, warp, and go out of alignment. It is imperative that you start by knowing if the chamber is aligned properly to the anilox roller. Check for blade alignment across, as well as contact the anilox roller on each side and top and bottom. The containment side blade should make contact slightly before the metering side blade does. Include inspecting and checking for chamber alignment in the regular preventative maintenance program for the press.
Inspect the blade every time you change one. Inspect the blade that you are throwing out. This tells you a lot on how the chamber is running. Uneven blade wear, in general, is a sign that something is wrong, or out of alignment.
If at some point scoring or back doctoring becomes an issue, then changes may need to be made to the way the blades are set up in the chamber. Always start out with the OEM recommended settings first, then make changes as you go, if needed.
The blade makes contact with the anilox 100 percent of the time. It only makes sense that the alignment and pressures with that blade will make all the difference in the life of the anilox roller. It is critical that the proper blade tip, thickness, and pressures are used when doctoring the ink. Preventative maintenance needs to be done on chambers on a regularly scheduled basis. The older the chambers are, the more you need to be concerned about warping and metallurgical issues with those chambers. Take time to schedule maintenance to check these chambers out for alignment and stability on a regular basis.
CHAMBER PREPARATION
Chamber preparation is critical within the daily routine for anyone using doctor blade chambers. Keeping the clamps clean and all pressure points clear of debris will allow for a straight and even doctor blade setting. Contamination or ink debris between the clamps will cause blades to ripple. Screws and bolts that hold down the clamps need to be proper size, so that they do not interfere with the anilox surface. Newer chambers have self-clamping systems that avoid using any small screws or bolts.

The blade should never overhang the end seal, but should stop in the middle of the end seal as shown above.
END SEAL ALIGNMENT
This is an area that everyone has struggled with at some time. Proper end sealing is critical to blade pressure settings and relates directly to the life of the anilox. If seals are leaking, the first response from an operator is usually to increase blade pressure. If the blades are set properly for doctoring, you may want to look at the end seal design to make sure that a modification is needed or not in that area.

Soft to hard foam, polyurethane, felt, rubber–these are just a few of the materials that end seals are constituted from. If the seal needs more pressure from the chamber to seal properly, add 1/8-in. or so to the seal height, so that it makes contact with anilox sooner and creates a better seal.
The blade needs to rest on the end seal and stop where the land flat ends. That is where the curvature of the end seal starts for the circumference of the roller. If the blade overhangs the land flat in that area, you may have issues with ink drying under the blade and causing build up of ink there, until it finally will blow out an end seal.
Try various types of materials that the end seals are made of. Different inks require different types of materials to create a proper seal. Polyurethane rubber, felts, and soft foams all react differently, based on chamber type and ink chemistry. Based on the wear and age of the chamber, this can change over time, and by making a material adjustment, you just may get a better seal.
Water-base and solvent inks have different abrasive properties and this affects the end seals and how they seal. Also consider the compression of the seal material, harder, softer. Some presses use a dead band area in the seal location and some do not. Having an engraved seal area does keep the end seal lubricated, however, if the engraving is a low line screen, it could add more friction to the seal surface and wear prematurely. Keep this in mind when running coatings and heavier volume ink applications. The same can go for dead band identification when running sleeves. If the anilox is a 180ls cell, the anilox supplier will engrave the dead band identification with the same line screen. The 180ls is a coarse engraving and may wear the end seal prematurely.
The circumference of the end seal should match up perfectly with the circumference of the anilox roller. This is an area you do not want to force the fit. The blade should never overhang the end seal but should stop in the middle of the end seal. Whatever type of material is used for the end seal it needs to fit well all on its own. Once the fit of the end seal is verified, if there are still sealing issues, move to trying different end seal materials.
Suggested Improvements: Try different seal materials and compression – Check for proper fit end seal land, height as well as circumference – Is the end seal material compatible with the ink chemistry? – Customize the seal from what it is, to what you perceive is needed to correct the leakage.
WASH-UP CYCLE
For presses with auto wash systems, there are many critical settings that affect the ink or solvent flow during a wash-up cycle. These settings need to be verified at startup on these presses, but should also be checked occasionally to insure that they have not changed from the start date.
These settings control the unloading of ink and solvent from the chamber during the wash cycle. If not synchronized properly, they can allow the anilox to starve or not get enough solvent during a wash cycle. This allows the blades to run dry against the anilox roller. Always verify that the wash-up system is timed correctly.
BACK DOCTOR
Back doctoring is noticed when you get ink in the form of stalactites dripping off the bottom clamp of the chamber. Stalactites can cause light polish lines to appear on the anilox roller. The picture shows some ink build up, excessive enough to make contact with the anilox surface. This has to be eliminated.
Choosing the correct blade thickness and edge type is important when it comes to blade wear and chamber containment. Back doctoring is an issue where ink gets doctored on the containment side, rather than going back into the chamber. Many containment blades have lower contact angles, or can be increased in length slightly to ensure that the blade does not doctor sharply against the bottom side of the anilox, but acts as a flap to let ink go back into the chamber and seal the ink as well.
Back doctoring is noticed when you get ink in the form of stalactites dripping off the bottom clamp of the chamber. As they build upon the blade, these stalactites can cause light polish lines to appear on the anilox roller. These are not score lines but they are lightly polished lines that will create a light print in that area as they polish the roller surface.
NO SHORTCUTS!
We are all guilty of taking short cuts, forgetting to follow standard operating procedures and not keeping to the specifications that we ourselves set at times. Spell out to the letter what is expected in the pressroom. Hold yourself and your people to these standards and the efficiencies expected will show benefit. If modifications need to be made, make them!
There are hundreds of variables that will affect the lifecycle of the anilox roller. When you lay all these variables out, it is easy to see why we all wrestle with the premature wear and the replacement of anilox rollers in the flexo process. From handling and care around the pressroom to constant contact of doctor blades and the heat created by the friction of those blades. Following procedures and setting standards into place is the only way to optimize profitability of the production process. The cleaner the environment is kept, the easier it is to manage and detect when any of these variables go out control.
 About the Author: Bill Poulson has been with Harper Corporation of America for 14 years. He is the Northeast technical graphics advisor for the Harper Graphic Solutions Division. He works directly with all narrow and wide web coaters and printers in flexo and gravure.
To view the original FLEXO Magazine article click HERE.


