Improved production efficiency and profitability are just two byproducts of a well thought out maintenance program for anilox rolls.
First published in Package Impressions Magazine, September 2013 issue.
Written by Harper Technical Graphics Advisor, Sean Teufler
If you are looking to improve flexographic production efficiency, there is no greater place than aniloxes to focus your energies. We know aniloxes play a critical role to the printing process and any anilox problems can cause great disruption to expected outcomes. What we will sometimes encounter in the field is a lack of quality anilox care, which leads to wasted substrate, time, and labor. These are concerns near and dear to every alert owner and production manager.
There are a number of reasons that create these problems, but they always come down to just a few things. Sometimes the problem is having the correct tools and sometimes it is a matter of understanding how to use those tools correctly. These are easy problems to fix. Problems can arise on a broader scope as well, so we will look into the anilox workflow and how to develop a true pattern of efficiency.
Getting started, we begin to understand by learning how the three major anilox systems of storage, protection, and handling contribute to anilox care. We will then need a comprehensive review of the anilox workflow to assess deficiencies in the process, whether it is equipment, personnel, and/or method. We finish by developing routines through a process of documentation, training, and using the right products for the job.
Storage, protection, handling
Anilox efficiency begins not at the press, but with anilox storage because of damage potential. Storage concepts vary from using the original container from the anilox supplier to mobile or static storage systems. The keys for any storage system follows.
We recommend physically storing the anilox in a manner that protects the engraving, and there are many elements to that end. First, you would include a design that keeps the anilox to the interior of the proposed storage, not exposing the engravings externally to passing hazards. Often it is a great idea to conceal anilox journals within the confines of the rack to keep anything from striking the journal and dislodging the anilox from the rack. Internalization of the anilox within the storage device also applies to stowing sleeve aniloxes.
For obvious reasons, it is important that the storage system itself does not contribute to anilox damage, especially when placing or removing the anilox from the storage unit. For metal racks, this means any metal surfaces that could come in contact with the anilox face must be shielded with rubber or foam. Upright supports and the frame are usually eligible to provide this unwanted contact, so look there first. There are a number of ways available to pad the storage unit. For racks with pegs, you can slip slightly longer ink tubing over the pegs and then you have a simple barrier to prevent contact with the engraved face of the anilox. Make sure the pegs are to the inside of the frame, or the anilox will surely rest on the frame itself. Sleeve racks should have rubber or plastic bump-stops that prevent the sleeve from striking a support or weld at the back of the unit. Sleeve racks can get too crowded for the available space, especially if loading sleeves that have a larger diameter than intended for the rack. You do not want any anilox sleeves coming in contact with another anilox sleeve. Short slide-out extensions can be made to ensure the sleeve cannot drop on the sleeve below without clearance. If your journalled aniloxes require hoists to remove and install at the storage system, locate the system so it is centered to help prevent the possibility of contact from the pendulum movement of the heavy anilox.

Transportation devices should be dedicated to aniloxes and not used for other press material. Sometimes we see anilox carts that also have flexible dies, plate cylinders, and other equipment sharing a very tight space on a cart and the aniloxes stored with these items are not well-shielded from contact. Keep in mind that storage should maintain protection, not expose the anilox surface to greater risk. If a cart or carts cannot be dedicated to aniloxes, then consider isolating aniloxes as much as possible from the other parts by using roll covers and fixed shielding.
We definitely recommend you consider specialty carts for anilox sleeves. Mobile sleeve carts provide a safe storage area and a transition/access point for the sleeves being removed or installed at press. This is a feature that cannot be understated. The other option, a concrete floor, is dangerous for the sleeve for two reasons. Sleeves are difficult to place on a bare concrete floor without damaging and floors do not provide any lateral stability, making sleeves easy to tip over. It is not recommended to never stand an anilox or anilox sleeve on the floor, but to transfer directly to and from the cart or storage rack. If you have no other choice, at least consider using sturdy rubber mats to guard the anilox from the hard concrete surface.
When it comes to anilox protection, the racks are not the only things you need. You should also consider roll or sleeve covers. These devices provide the first-line of defense and their use has saved many an engraving from gouges, drag marks, and chips. They also serve well as dust covers and to prevent contamination of the engraving surface by oil or grease. Most anilox covers have traditionally been leather and come padded or unpadded with or without edge protection, depending on your preference. Hard plastic covers have become popular, either choosing split for journal aniloxes or unsplit for slipping over anilox sleeves. Once any roll cover becomes soiled, we recommend you clean them so the engraving surface does not get contaminated with grease, oil, or ink residue.
Anilox workflow
We have already discussed the methods for storing and protection, now you must consider the broader subject of workflow. The anilox workflow also starts at storage. Sometimes the storage racks themselves are mobile and can be positioned in a manner that allows easy access at press. If that is not available, it is recommended to have a cart that allows the aniloxes to be transported without hand-carrying them. The cart must maintain the same secure conditions as the storage does, or it becomes a likely location where damage can occur. The workflow then moves on to the press itself. If gears and bearings are installed at this point, a workstation should be in place that is free of any debris and a secure method for keeping the anilox in place by use of static, locked-down v-blocks. It is suggested to maintain any roll cover protection during transportation and installation of the anilox. When the roll or sleeve is secure in press, only then should the cover be removed.
Anilox cleaning
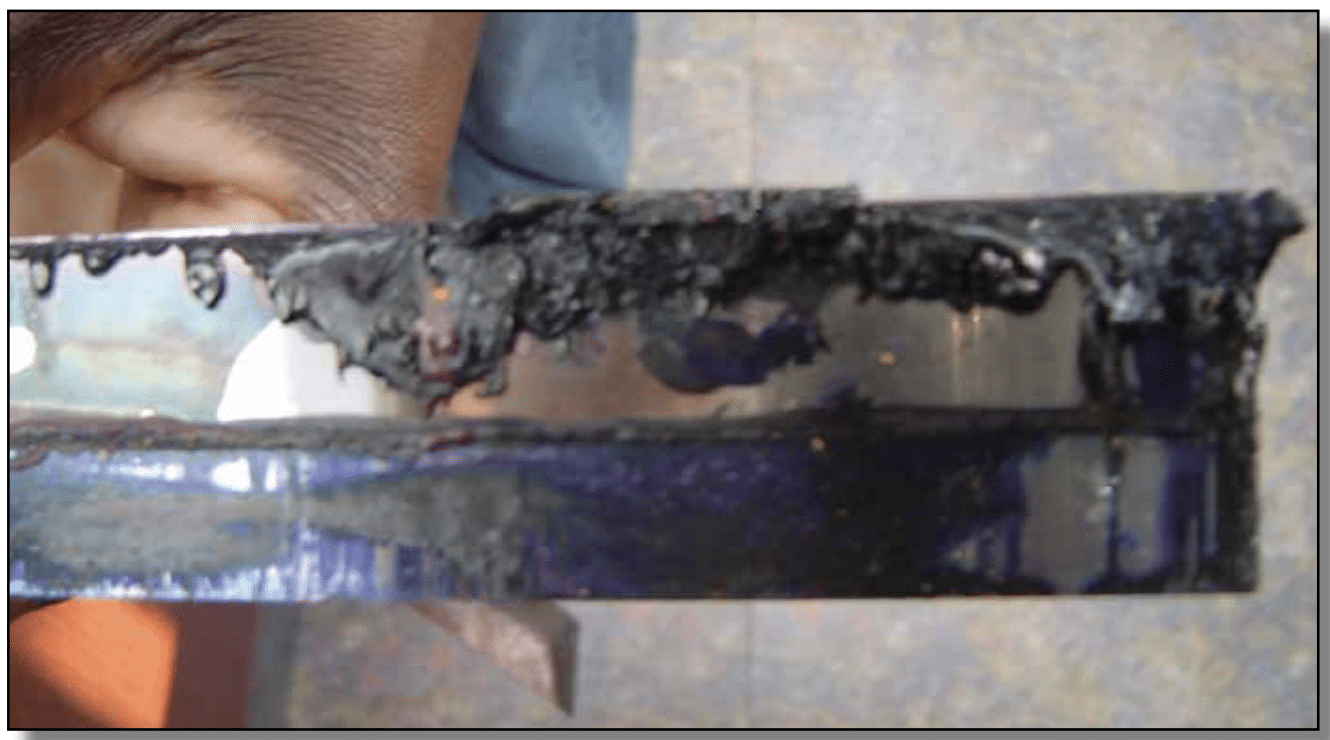
Once the anilox has finished its task in press, then it is time to move on to proper cleaning. Thorough anilox cleanups in press are sometimes errantly skipped to save time; as we have learned, however, a plugged anilox will cost you production and eliminate any time savings. The reality is that by using the right cleaning products and procedures, it takes very little time to clean an anilox. The cleaning process is not just scrubbing, but also rinsing, drying, and installing the protective cover. The slight investment in time is compensated by not having to transfer an inked anilox that will drip, or in the case of an anilox slated for reuse on the next job, the needed volume is maintained and helps avoid all of the related costs of additional cleaning, adjusting inks, and wasting substrate. The catch here is getting the right products involved instead of compromising.
While there are many revolutionary products in the printing industry for cleaning aniloxes away from the press, the trend for in-press solutions has rebounded to a degree, mainly because printers have found cleaners and equipment that are much more efficient and effective than in the past. For a primary system like anilox cleaning in press, it has been a matter of developing tools that clean without damaging the anilox surface. Gone are the abrasive pads and cleaners. They have been replaced with sponges, foam cleaning pads, and non-corrosive inkemulsifying cleaners.

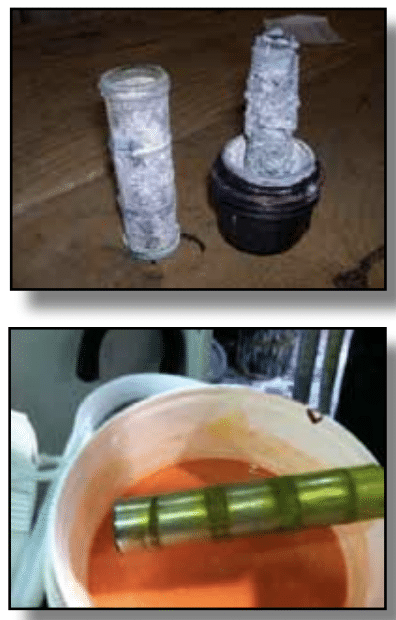
Mobile sleeve carts provide a safe storage area and a transition/access point for the sleeves being removed or installed at press.
Cleaning at press has a twofold benefit. First, you save on the time it takes to remove the anilox, which on older presses is an important consideration, and you greatly diminish the opportunity to damage the anilox as it is transported. Secondary systems are categorized as external cleaning methods, typically equipment-based but can also include an area where aniloxes are manually cleaned away from press. These secondary systems are often an effective time-saving solution when used properly. The key to effectiveness is having the system tuned to OEM specifications and making sure the system is periodically maintained. When cleaning effectiveness wanes and/or anilox damage occurs, you will often find the settings are no longer correct because the system has not been maintained sufficiently and instead of a simple part replacement, the problem has been bypassed instead of addressed. Poor cleaning, anilox damage, and extensive cleaning cycles are the result, wasting time and money.
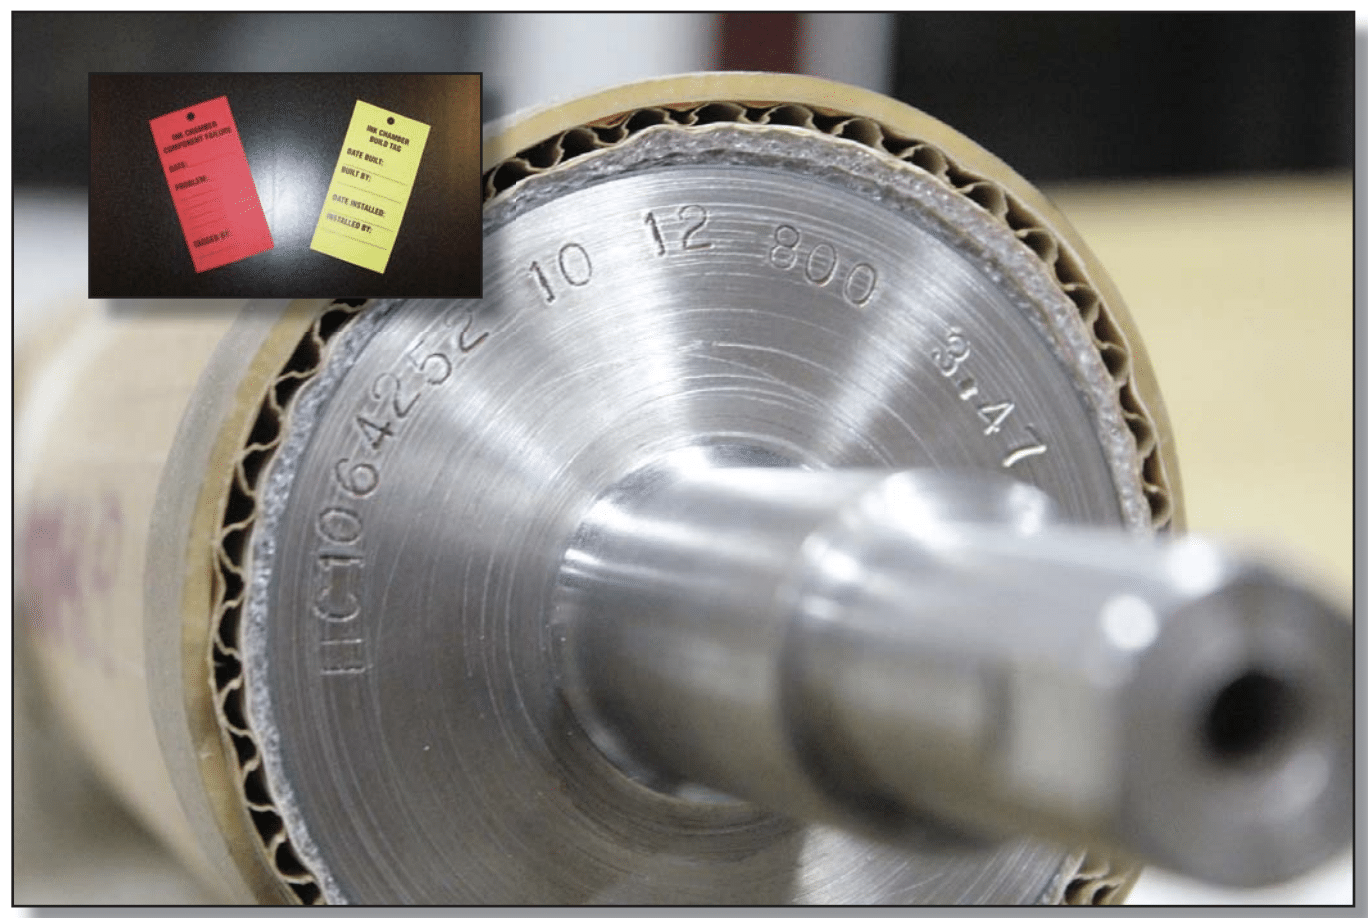
These secondary systems may also require bearing and gear removal or protection devices to prevent damage to those components, adding preparation time. Look to minimize the time it takes to protect the bearings by using rubber gloves that are secured over the bearings/journals and consider more robust guards like shielding or caps that can seal them off from the cleaning liquid or media. The guards are simple to install and take a few seconds of time and the problem is resolved without spending time to prepare the aniloxes. You will often find the suppliers of those systems also supply guards that are custom-fitted to the bearing/gear design of your particular aniloxes.
A winning routine
It must be mentioned that while many of these ideas are inherently obvious to most, every detail may not be apparent to everyone you employ and thus the need to have procedures written down that describe exactly how you want the aniloxes to be cared for and what will be your expectations of the condition. It is unrealistic to expect everyone given the task of cleaning aniloxes to fully understand the process without some training, guidance, and a demonstrated competence.
Keep in mind that storage should maintain protection, not expose the anilox surface to greater risk.
Any of the procedures, from cleaning to transportation to storage, can be broken down and recorded into a documentable method so that anyone asked to perform those tasks can do so to a level that yields the most efficient outcome for their anilox condition. Sufficient training and an explanation of why things are done a certain way lends to getting a credible effort by those tasked with cleaning and caring for the aniloxes. We recommend getting your team together to form one document for each task. There may be some variation due to press configurations but the core tenets will stay the same.
In the following example, the general method for an anilox cleanup of a narrow-web press using a single-blade unit and subsequent storage away from press:
• Documentation example—Back off blade pressure, allowing ink to build on anilox surface to keep it wet. Stop the anilox. Drain the ink from the tray. Immediately address the wet ink on the anilox surface by using a spray cleaner, keeping the anilox wet until the anilox surface can be cleaned and rinsed. Dry the cleaned anilox and prepare to protect it with a roll cover before removal. Carefully remove the covered anilox from the press and transport it to the storage area by use of a protective anilox cart.
You should also consider procedures for secondary cleaning systems, press installation and removal, gear and bearing installation and removal, inspection, troubleshooting, and so on.
Inefficiency is an unwanted byproduct that occurs when one or more of anilox protection, care, and maintenance duties fall short of reasonable expectations. Those who measure their productivity and waste can capture the signs of inefficiency and begin to do something about it. You will see the savings in time and money by following the recommendations for anilox protection, care, and maintenance because a damaged or dirty anilox in inventory only wastes an operator’s time. In addition, if the anilox is unique, you may have to compromise at press by selecting a roll with a different line and volume. Compromise from a designated setup always adds waste as adjustments are made.
Optimal results
When aniloxes are prepared and cared for properly, you get the exact results the prepress, operator, and ink technician would expect. Having the correct tools and the knowledge to use them allows your employees to perform their jobs efficiently. Tools and knowledge help optimize conditions, so providing the right finished product with low makeready waste and in a timely manner become a normal practice. It is recommended that you review storage, cleaning, and maintenance processes with your anilox supplier to make sure you are making all the right choices to preserve your anilox investment.
We advise every printer to reject the status quo of day-to-day operations by making frequent reviews of how processes could improve to create the desired anilox process efficiencies.
 About the Author: Sean Teufler, technical graphics advisor with Harper Corp. of America, has 22 years of experience in the flexographic industry.
To view the original Package Impressions Magazine article click HERE.